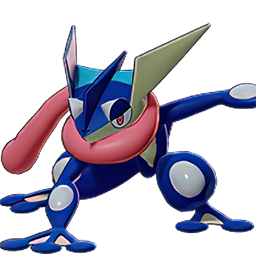
For nerd EvilSpirt29 Greninja - Punny
so you can finally deal more than 15k damage (stop trolling my elo)
Build Path
BubbleFirst Pick
Damage. Slow.
Water Shuriken
Damage. HP Vamp. Slow. Increases your movement speed.
Double Team
Dash. Distraction. (+)CDR.
Waterburst ShurikenUNITE
AOE damage and Slow. Then AOE damage. Displacement. Then: Dash.
Razor Claw
After using a move, the Pokémon's next basic attack deals more damage. If held by a melee Pokémon, the basic attack also slows opposing Pokémon.
Stat Boosts
Bonus Attack Damage On Hit
Critical Damage
Guide
As an attacker, your job is to dish out constant damage during teamfights whilst not taking much damage as you are frail; let me take all the damage as I'm the tank. You are at your strongest in the middle of the game as you evolve fully at level 7, which is earlier than a lot of other good-damaging Pokemon, allowing you to outdamage them halfway through the game at fights such as first Drednaw, which is VERY important as it sets the pace for the rest of the game. You need to coordinate with Gurjot and dive the same enemy and poke when necessary. Patience is key. Do not be too aggressive until you get Water Shuriken.
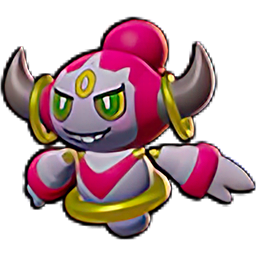
Both you and Gurjot require levels early in the game, so if you are with him just try and defeat the Aipom in lane as quickly as possible. If you are playing with Jasmine, she will be a support (Hoopa) so she will be weakening lane Pokemon for you; you should be getting the final hit on all Pokemon to gain an early exp advantage.
After defeating ALL of the Aipom in lane (STOP LEAVING THEM THERE PLEASE), go for the Audino at the top of bottom lane; expect a fight here, as any player with common sense will go for it. This Audino is in the dead center of the top of the lane, meaning that it is anybody's Pokemon to take, so the first fight of the game is a small one where you have to take Audino for an early exp advantage. Save your abilities for when Audino is low so you can take the last hit, as you shouldn't waste abilities on enemies; chasing them early on is a death sentence and they shouldn't overextend anyways.
One you have killed it, go back to your goal to heal if necessary and take the other two Audino on your side down in the sand; the other team may push this and try to steal the Audinos for an advantage, so try and drag them towards your goal. If the enemies overextend, you and your lane partner should coordinate to target one down and kill them.
Behind your goal where the berries spawn, there is a small sandy area; a Corphish spawns here at 9:00 minutes left, so you should take it for some extra exp.
Vespiquen and Combee spawn at 8:45 minutes left in the middle of the lane; just like top Audino, it is anybody's to take so expect a fight to go down. The Combee are frail and give very little points and exp, but it is still important to try and take them. Vespiquen however is the most important, as it is the tankiest so it gives the most exp. If you are able to get the most wild Pokemon in this fight (more than the other team), then you should have an early advantage which allows you to maintain control of bottom easier. THIS DOES NOT MEAN YOU SHOULD PUSH TOO AGGRESSIVELY! Fall back after this fight unless you and your lane partner are both healthy and the other team is pushed out.
After this, the game becomes a game of patience; you have to poke enemies when they try and push too far, otherwise you just need to farm any wild Pokemon that spawn. Try and gain as much exp as you can without the other team scoring or getting a pick until 7:00 minutes left where the first big fight begins.
Both Rotom and Drednaw spawn at 7:00, Drednaw being the one that spawns down in the sand at the bottom of bottom lane; the first Drednaw is quite important and sets the pace for the rest of the game. At this point, Richie should have joined you in lane and you will either be in the middle of pushing or should be trying to secure Drednaw. Drednaw is always far more of a priority than scoring, as it gives the entire team a lot of exp (basically a free level) and a shield; this sets your team up to dominate lanes as they have a level advantage, allowing them to be more aggressive and take more risks. If you have your ultimate by this fight, do not be afraid to use it so that you can get Drednaw.
If the other team has control of the area at the time, try and carefully make your way into a bush and attempt to steal it when it gets really low.
The rest of the game is pretty simple; defend goals, poke, farm ults and levels off of wild Pokemon. Coordinate pushes with your team if you see an opportunity e.g you pick off an enemy without having to use too much and are relatively healthy, push with your team whilst they are at a disadvantage.
Just ensure that you are always able to challenge Drednaw and the other team when they go to fight it; Drednaw will always be a priority.
When it hits 2:00 minutes left, Zapdos spawns in the middle. If the team is winning by a lot, you play defence and make sure Zapdos is not taken. If you are losing by a lot, go for Zapdos. I (Punny) will probably call out whether or not to fight for it, just make sure you have your ult ready or close to ready as yours is quite important in winning whatever big teamfight occurs.
Both teams tend to gather in the middle of the map, trying to seize control over the area whilst fighting the boss, Zapdos. The team that manages to score the last hit on Zapdos is often the winning team, so ults are incredibly important here. Ults that are chained together tend to win the already quick fight as everyone around you is melted down. In this fight, you should try and focus down healthy targets and melt down their health so others can finish them off. If we get Zapdos, RUN to the enemy goals, get the instant score and tp back to spawn to play a strong defence.
If we lose Zapdos, try and tp back to spawn, jump onto a goal and then challenge opponents and distract them with Double Team and slow them with Water Shuriken. DO NOT let them touch the goal as they will be able to score instantly, giving them a massive point advantage and healing any damage you dealt to them.
The game then ends.
EXPLANATIONS OF BUILD:
Starting Move - Bubble - A short cooldown damaging move that helps you quickly clear the Aipom in lane whilst still having it off cooldown for top Audino, slows Pokemon as well so you can kill things quicker.
First Move - Double Team - A quick dash that you can use to deal extra damage with Water Shuriken or as an escape option when Eject Button is on cooldown. USE WISELY, good players can tell which one is the real Greninja.
Second Move - Water Shuriken - Greninja's best source of damage, use Double Team then Water Shuriken to maximise this damage. Aim it well and you'll get lots of lifesteal, allowing you to stay alive in fights whilst slowing opponents to prevent their escapes.
Waterburst Shuriken - Ultimate - You jump on an opponent whilst dealing AOE damage and slowing them. You are vulnerable during this state, ensure that you aren't 1 HP when you use it. Your ult is great to apply a slow and lots of damage to enemies in a teamfight so that you can prevent escapes and fulfill your purpose on the team.
ITEMS:
Muscle Band - A lot of your damage comes from basic attacks. Muscle band increases your attack stat and makes basic attacks do more damage the more HP the opponent has, allowing you to deal a lot of damage for your team.
Scope Lens - Boost the crit rate and crit damage of your attacks; effectively allows all of your moves to deal more damage.
Razor Claw - Increases damage of basic attacks further, applies a slow on melee attacks and increases crit rate further; more damage from basic attacks.
Eject Button - A quick teleport to escape fights you need to get out of; still doesn't mean you should overpush all the time. Make sure to keep track of its long cooldown when you are deciding when and what to fight.
Works Well With
Pokemon Unite .GG thanks user Punny for sharing this guide on how to play Greninja. Be sure to support your favorite creators by upvoting their builds, videos, and anything else they share you find useful. You can also check this user's page for more build guides.
There are indeed many ways to play Greninja in Pokemon Unite, and you can find more builds here, as well as detailed information about Greninja's moves and the items you can assign to it.
Perhaps you have a better build in mind? Try creating your own!
For more information on build guides, check out our detailed FAQ page to answer any more questions you may have.
