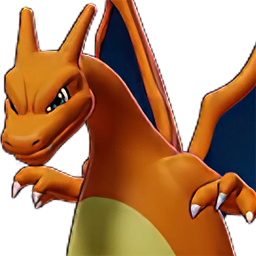
For stupid FrNoMaidens Charizard - Punny
you suck and need to get good or you are kicked
Build Path
Flame BurstFirst Pick
Damage. Burn. Movement Speed up.
Fire Punch
Damage. Displacement. Burn.
Fire Blast
Area of Denial. Damage. Slow.
Stat Boosts
Bonus Attack Damage On Hit
Shield (Upon Unite)
Unite Move Damage Increase
Guide
As an all-rounder, your job is to live through teamfights, dishing out constant damage. All-rounders tend to be weaker in the early game, stronger in the late game due to their tendency to have 3 stages of evolution and evolve at a later level such as 9/10; you should reach this level at around 6:00 minutes left. You have an important role in fights such as second Drednaw and Zapdos as you have an incredibly strong ult that allows you to deal a lot of damage all at once; you need to be careful with positioning throughout the game since you require a level advantage to do well and can only play aggressive once you receive Fire Punch at level 5.
Both you and Avi require levels early in the game, so if you are with him just try and defeat the Aipom in lane as quickly as possible. If you are playing with Jasmine, she will be a support (Hoopa) so she will be weakening lane Pokemon for you; you should be getting the final hit on all Pokemon to gain an early exp advantage.
After defeating ALL of the Aipom in lane (STOP LEAVING THEM THERE PLEASE), go for the Audino at the top of bottom lane; expect a fight here, as any player with common sense will go for it. This Audino is in the dead center of the top of the lane, meaning that it is anybody's Pokemon to take, so the first fight of the game is a small one where you have to take Audino for an early exp advantage. Save your abilities for when Audino is low so you can take the last hit, as you shouldn't waste abilities on enemies; chasing them early on is a death sentence and they shouldn't overextend anyways.
One you have killed it, go back to your goal to heal if necessary and take the other two Audino on your side down in the sand; the other team may push this and try to steal the Audinos for an advantage, so try and drag them towards your goal. If the enemies overextend, you and your lane partner should coordinate to target one down and kill them.
Behind your goal where the berries spawn, there is a small sandy area; a Corphish spawns here at 9:00 minutes left, so you should take it for some extra exp.
Vespiquen and Combee spawn at 8:45 minutes left in the middle of the lane; just like top Audino, it is anybody's to take so expect a fight to go down. The Combee are frail and give very little points and exp, but it is still important to try and take them. Vespiquen however is the most important, as it is the tankiest so it gives the most exp. If you are able to get the most wild Pokemon in this fight (more than the other team), then you should have an early advantage which allows you to maintain control of bottom easier. THIS DOES NOT MEAN YOU SHOULD PUSH TOO AGGRESSIVELY! Fall back after this fight unless you and your lane partner are both healthy and the other team is pushed out.
After this, the game becomes a game of patience; you have to poke enemies when they try and push too far, otherwise you just need to farm any wild Pokemon that spawn. Try and gain as much exp as you can without the other team scoring or getting a pick until 7:00 minutes left where the first big fight begins.
Both Rotom and Drednaw spawn at 7:00, Drednaw being the one that spawns down in the sand at the bottom of bottom lane; the first Drednaw is quite important and sets the pace for the rest of the game. At this point, Richie should have joined you in lane and you will either be in the middle of pushing or should be trying to secure Drednaw. Drednaw is always far more of a priority than scoring, as it gives the entire team a lot of exp (basically a free level) and a shield; this sets your team up to dominate lanes as they have a level advantage, allowing them to be more aggressive and take more risks. If you have your ultimate by this fight, do not be afraid to use it so that you can get Drednaw.
If the other team has control of the area at the time, try and carefully make your way into a bush and attempt to steal it when it gets really low.
The rest of the game is pretty simple; defend goals, poke, farm ults and levels off of wild Pokemon. Coordinate pushes with your team if you see an opportunity e.g you pick off an enemy without having to use too much and are relatively healthy, push with your team whilst they are at a disadvantage.
Just ensure that you are always able to challenge Drednaw and the other team when they go to fight it; Drednaw will always be a priority.
When it hits 2:00 minutes left, Zapdos spawns in the middle. If the team is winning by a lot, you play defence and make sure Zapdos is not taken. If you are losing by a lot, go for Zapdos. I (Punny) will probably call out whether or not to fight for it, just make sure you have your ult ready or close to ready as yours is quite important in winning whatever big teamfight occurs.
Both teams tend to gather in the middle of the map, trying to seize control over the area whilst fighting the boss, Zapdos. The team that manages to score the last hit on Zapdos is often the winning team, so ults are incredibly important here. Ults that are chained together tend to win the already quick fight as everyone around you is melted down. In this fight, you should try and focus down healthy targets and melt down their health so others can finish them off. If we get Zapdos, RUN to the enemy goals, get the instant score and tp back to spawn to play a strong defence.
If we lose Zapdos, try and tp back to spawn, jump onto a goal and then challenge opponents and push them away with your punch etc.
The game then ends.
EXPLANATIONS OF BUILD:
Starting Move - Flame Burst - A short cooldown damaging move that helps you quickly clear the Aipom in lane whilst still having it off cooldown for top Audino
First Move - Fire Punch - A high damage move that eithers displaces an enemy or allows you to quickly chase them down to finish them off. It also gives you another escape option when Eject Button is on cooldown.
Second Move - Fire Blast - Large AOE damage that also slows opponents, allowing you to prevent escapes and deny space.
Fire Blast to slow enemy down, Fire Punch to displace them and chase them down.
This combo greatly helps when a low HP Pokemon is trying to get away. DO NOT overpush whilst doing this however; know your limits.
Seismic Slam - Ultimate - Quickly grabs someone into the sky and slams them down into the ground, dealing big damage and rendering them useless whilst grabbed. When the slam lands, you are faster, able to fly over obstacles whilst dealing increased damage, draining health with your basic attacks and burning them; your ultimate buffs you a lot and is incredibly broken, so when you're in trouble in a teamfight, pop your ult and you'll be incredibly hard to kill as you can't even be stunned.
ITEMS:
Energy Amplifier - Increases ultimate charge rate and further buffs your damage after using your ultimate; you become incredibly broken whenever you use your ultimate.
Muscle Band - A majority of your damage comes from your basic attacks, especially in your ultimate. Muscle band increases your attack stat and makes basic attacks do more damage the more HP the opponent has, allowing you to deal a lot of damage for your team.
Buddy Barrier - When you use your ultimate, Buddy Barrier creates a shield for you and a nearby ally with low HP, which not only helps greatly in teamfights but makes your ultimate even better than it already was.
This is 1,4oo words long, mb
Works Well With
Pokemon Unite .GG thanks user Punny for sharing this guide on how to play Charizard. Be sure to support your favorite creators by upvoting their builds, videos, and anything else they share you find useful. You can also check this user's page for more build guides.
There are indeed many ways to play Charizard in Pokemon Unite, and you can find more builds here, as well as detailed information about Charizard's moves and the items you can assign to it.
Perhaps you have a better build in mind? Try creating your own!
For more information on build guides, check out our detailed FAQ page to answer any more questions you may have.


