Aegislash Aegislash - Nipi


Ultimate Sword, the Ultimate Shield
Build Path
Shadow Claw
Damage. Displacement. Increase boost count. (+) Increases Crit Chance.
Iron Head
Damage. Increase boost count. Block. (+) After block, increase Attack.
Coup de GraceUNITE
AOE Damage. More damage against low HP opponents. Increase boost count on knockout.
Scope Lens
Boosts critical hit damage.
Weakness Policy
Increases Attack based on damage received.
Buddy Barrier
When using a Unite Move, shield yourself and your nearby ally with the lowest HP.
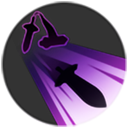
Slow Smoke
Slows the Movement Speed and basic attack speed of nearby opponents.
Stat Boosts
Critical Damage
Shield (Upon Unite)
Guide
Aegislash is probably one of the most unique hero in a MOBA game, capable of changing its' stance from defensive to offensive, and vice-versa. Its' capabilities on a duel, initiating a combat, or even a 1-versus-2 is incredibly extraordinary.
Playing Aegislash requires you to assess your situation correctly, along with juggling your resources sparingly.
Now, without further ado, let's start with item choices!
--------------
Item Choice
1. Scope Lens -- Essential for Aegislash, while it is absolutely not Absol (heh), Aegislash's main damage source will be on his normal boosted attacks. Scope Lens will give your boosted attacks a boost (get it?) when you deal critical hits!
2. Weakness Policy -- I feel like everyone looks down on this because this item requires you to survive in order to fully utilize its' effects. Well, not to fear, Aegislash's Shield Forme and its boosted attacks will ensure you can utilize this item's potential to its' maximum!
3. Buddy Barrier -- This is what I usually use when I climb the ranks in solo queue, since most people love to fight without considering their team's capabilities, you can use your Unite Move to protect them and give yourself a shield to engage them.
Alright, now the honorable mentions!
1. Attack Weight -- I often use this when I play with a group. Aegislash does not have an escape tool or crowd control tool to help him in his escape, rendering scoring build difficult. The only time Aegislash can score is when its' team absolutely wrecked a lane. Plan your attacks with your team, demolish your enemies, then goal!
2. Muscle Band -- Aegislash's Sword Forme attack speed feels as fast as a Lucario's attack speed with a Muscle Band, rendering this item quite redundant for it. However, if you wish to deal more damage on Shield Forme, thereby increasing your chance of survival, I think Muscle Band can help you with that.
3. Focus Band -- If you're unsure about your survivability on the field, especially on early levels, Focus Band can help you with that. It can also withstand damage-over-time effects such as Charizard's burn which ignores shield.
Let's get on with Battle Items!
--------------
1. Slow Smoke -- Having a kit which can chase enemies makes Aegislash incredibly terrifying, but it also renders it easier to kite. This item ensures your target can't escape you as you pierce through them.
2. Full Heal -- Aegislash is incredibly susceptible to crowd control, making Full Heal a decent choice.
3. Potion -- Aegislash is extremely fragile on early stages (level 1-6) because of his passive, No Guard. Having a pocket heal item would help its survivability.
Alright, let's get to Aegislash's kit!
--------------
Boosted Attack -- Mechanics
It is important to note that Aegislash evolution line does not gain a boosted attack counter like most Pokémon. You have to earn them by casting your skill and fulfill a requirement. Honedge and Doublade's boosted attack follows a similar behavior with Aegislash Sword Forme's boosted attack.
Passive: No Guard (Honedge & Doublade)
"Boosts your damage, and the damage you receive."
This alone should make you wary about Honedge and Doublade's fragility, however, this is also what makes Aegislash (that is, Honedge and Doublade) could be used on the middle path.
Passive: Stance Change (Aegislash)
"Change to Sword Forme by using Shadow Claw/Sacred Sword, grants ATK and Attack Speed, boosted attacks pierce the opposing Pokémon. Change to Shield Forme by using Iron Head/Wide Guard, granting DEF and Sp.Def, boosted attacks leaves the target unable to act for a short time and heals the user's HP while also decreasing the cooldown of Shadow Claw/Sacred Sword."
Since Aegislash's passive have two parts, let's break them down, let me start with Sword Forme.
Sword Forme -- "Aegislash has high ATK, but low DEF and Sp.Def. Aegislash's boosted attack pierces through enemies (deals damage to more than 1 enemy in a line -- this also applies to Honedge and Doublade)."
This is what you want to use when you want to deal damage. Keep in mind that Aegislash will dash to an area exactly BEHIND its target, dependent on where Aegislash was when it uses its boosted attack.
Shield Forme -- "Aegislash has high DEF and Sp.Def. Aegislash's boosted attack stuns the target for a short time (only canceling their current move), healing him based on the damage he deals, and reduces the cooldown of Shadow Claw/Sacred Sword by 1 second."
This is what you want to use when you want to survive, and staying on the offensive. Keep in mind that Aegislash will dash to an area exactly in FRONT of its target, dependent on where Aegislash was when it uses its boosted attack.
Move 1 - Tier 1: Shadow Sneak (Cd: 5s)
"Deals damage to enemies in a straight line, stopping behind the first enemy hit. When Honedge deals damage to an enemy on the straight line and stopping its dash, gains 1 boost count."
You always want to use this to either damage a wild Pokémon on trade (ex: bottom lane middle Audino), then uses its boosted attack gain to dash back. Always remember that the one which gives the boost count is the straight dash which stops behind the first enemy hit, not the AoE dash damage.
Move 2 - Tier 1: Iron Defense (Cd: 6s)
"Blocks 1 instance of damage, gain 1 boost stack when an instance of damage is blocked."
This is a highly underrated, however incredibly powerful defense tool. Always use it while farming wild Pokémon, except for Aipom. Use it on combat to nullify a move damage from enemy Pokémon.
Move 1 - Tier 2a: Shadow Claw (Cd: 5.5s)
"Dash, dealing 3 instances of damage to an area. The last instance of damage knocks up enemies in the area. Gain 1 boost count if any of the instance of damage hits."
(+): "Increase Crit. Chance for all your attacks except for Unite Move."
My preferred choice for Move 1 - Tier 2. Low cooldown, knock up, and increased critical hit chance at level 11 makes this move incredibly potent while dueling, chasing, and engagement. Always use this move whenever possible to deal massive damage to enemies, and strike your enemies with Sword Forme's boosted attack!
Move 1 - Tier 2b: Sacred Sword (Cd: 7.5s)
"Mark a triangular area, dash to the center of the area, dealing damage and knocking up enemies in the area. Confers 1 boost count for each Pokémon hit, a maksimum of 2 boost count for wild Pokémon, no limit for the Pokémon of the opposing team. If this move hits, Aegislash partially ignores the defense of all opposing Pokémon."
(+): "Increase ATK for a short time if the triangular area deals damage to opposing Pokémon."
I'm torn about Sacred Sword, on one hand, it have a cool name and cool effect. On the other hand, its cooldown is abysmal for a bruiser dependent on boosted attacks to deal damage. Use this only if you trust your team to deal damage and protecting you, avoid this if you decided your teammates can't follow-up a crowd control.
Move 2 - Tier 2a: Iron Head (Cd: 7s)
"Dash to an area, dealing damage to opposing Pokémon hit. Confers 1 boost count when you activate it. Also gives a shield that can nullify an instance of damage. Confers 1 boost count when this shield nullifies an instance of damage."
(+): "Increase ATK when the shield nullifies an instance of damage."
My preferred choice for Move 2 - Tier 2. It grants you a dash, grants 1 free boost count, and a damage-nullifying shield to boot. Always use this while farming and in an engagement after using your Move 1, often times enemies will mash their attack button on you, granting you 1 extra boost count.
Timing is also essential here, while fighting caster or burst Pokémon such as Gardevoir, you can time your Iron Head right to nullify its' Future Sight's damage. This also works with Unite Move, so if you time your Iron Head right, you can nullify a Cinderace's Unite Move damage!
Move 2 - Tier 2b: Wide Guard (Cd: 9s)
"Grants shield, knocking up enemy Pokémon in front of Aegislash. Confers 1 boost count when it hits a Pokémon. After a brief duration, knocks enemies back, slowing them and conferring 1 boost count when it hits. If the shield is spent before the duration is over, Aegislash knocks enemies back and slowing them, conferring 1 boost count."
(+): "Lower this move's cooldown."
I'm torn with this move, on one hand, it's an incredible move akin to Snorlax's Block, knocking enemies back and makes them defenseless against follow-up attacks. On the other hand, it limits your mobility and your way to increase your stacks. Only pick this if you really, REALLY TRUST your teammates. Aegislash cannot easily follow up his own crowd-control. This move's cooldown is also incredibly high, rendering you defenseless when you've used all your boost count.
Ultimate: Coup de Grace
"Targets a straight line and deals damage to them. Deals bonus damage when dealing damage to Pokémon with low health. When this move knocks an opposing Pokémon, confers 2 boost count."
The ultimate "make-it-or-break-it" Unite Move in the game. Almost always use it to secure objectives, namely Drednaw, Rotom, and Zapdos. The instance of damage enters into effect after Aegislash finishes its' animation. It will take you awhile to get accustomed by it, but rest assured that it will kill anything in low health.
Always focus on objectives whenever your Unite Move is up, and always zone out your enemies whenever your Unite Move is down, since you have no finisher actions except your boosted attacks.
Alright, now for lanes!
--------------
1. Middle Path: The Shuffling Speedster
My preferred path. Gone are the days of Speedsters and Attackers dominating the middle path, long live the All-Rounder on the middle path!
When you pick this path, you only have one objective: Be Aegislash as soon as possible, then dominate the game. Defeat the Lillipup as soon as possible, taking a note to where the dog goin' (heh). At this instance, you have to choose whether you want to protect your allies from a 2-versus-3 scenario, or try to engage in a 3-versus-2 scenario. Middle lanes usually go like this:
Ludicolo > Bouffalant > Bouffalant lane Corpish > Ludicolo lane Corpish > engage with Ludicolo lane.
If you believe that your opponent goes with that scenario, and want to ensure your allies have an even ground, then you have to do this:
Ludicolo > Ludicolo lane Corpish> Bouffalant > Bouffalant lane Corpish > engage with Bouffalant lane.
If everything goes well and there are no invades, you'll be a Doublade with your Move 1 - Tier 2 already (level 5), hide on a bush, then plan an attack with your teammates. Ensure that your move hits as many Pokémon as possible, your teammates can follow up your moves and lay waste to the enemy team. If the enemy team survives, go back to the middle path because Ludicolo already spawned. If your lane obliterated the enemy team, goal, then return to the middle path.
NEVER, EVER, TAX YOUR ALLIES' LANE. Taking their wild Pokémon will ensure that those lane will be behind on experience while you, on your high horse, doing your own thing on the middle lane. Play as a team, not a tax collector.
After you return to your lane, do the following circuit:
Ludicolo > Bouffalant > Bouffalant lane Corpish > Ludicolo lane Corpish (if any) > engage Ludicolo lane
This is done to ensure the Ludicolo lane can get experience from Corpish, since you left Ludicolo lane with their own devices, trying their best to repel the enemy attackers, rendering them behind on experience. Set up your attacks on bush with your teammates and ensure you win that Vespiqueen-Combee spawn, preferentially obliterating the enemy lane as well.
Now, the two objectives should spawn this is what you should do:
TAKE WHATEVER OBJECTIVE THE LUDICOLO LANE IS IN, if it's on top, then take Rotom, if it is on bottom, then take Drednaw. Do not second guess your judgment, since the longer you delay, the longer it is for the enemy team to setup their own plan of attack.
No matter what objective you target, you will still be on level 8. Whether you win or lose the objective, go to the remaining objective, and try your best in getting them.
If everything goes well in that sequence, you'll reach level 9. This is when you should stop going to the middle path, and let other Pokémon take them, except for Bouffalant, since you need its buff to slow enemies down.
Always juggle top and bottom path, ensuring your goals are well protected, and fight any would-be attackers in your goal. Do not hesitate to use your ultimate to fight your foes. Ensure that you can secure any of the remaining objectives, increasing your team's momentum.
2. The Bottom Path: The Audacious All-Rounder
Just like every all-rounder in the game, farm all your Aipom, hoping your lane partner don't take any of your farm, and win the Audino trade. It is incredibly risky play to try to engage in Audino trade, because of Honedge's No Guard, however, you can do this by not using your Shadow Sneak to engage Audino and rather use it to last hit the Audino. A more expert play would be using Shadow Sneak to lower Audino's health, then uses Honedge's boosted attack to attack and knock out Audino, ensuring you dash towards your goal to safety.
If you win the trade, ensure you also farm all Audino remaining on your side of the field. Farm Bottom Path Corpish when it spawns on 09:00 mark, and this will ensure you to be a Doublade with your Move 1 - Tier 1 on your hand. On 08:50 mark, ensure your Move 1 - Tier 1 to knock as many Pokémon as possible, if you think you can win the combat, then always target the damage dealer. You won't get anywhere trying to defeat the supports.
No matter how the game progresses, do your thing and keep farming. Without a knockout, Vespiqueen and Combees, or goal, you'll need 3 more Audinos or 2 Audinos and a Vespiqueen to enter level 7. Once the game enters 07:40 mark, get ready for another fight on Vespiqueen and Combees, you have to either get the Vespiqueen or knock out the opposing Pokémon, if not, you'll be behind and still be a Doublade, which is a death sentence for Aegislash.
After winning the fight, go directly to Drednaw -- or, if you have enough Aeos Energy, destroy the enemy's goal to deny their movement speed boost. You HAVE to get the Drednaw, do not worry too much about invading enemies, especially after you obliterated them in the last fight.
If Rotom is still alive, abandon your goal and try to get the Rotom. If your team is composed of buffer supports like Eldegoss or defenders who can knock back enemies like Blastoise, you are better off supporting the Rotom. Remember: You have the momentum from Drednaw's experience boost.
If not, let Rotom push by itself and go farm again, you need to reach that level 11 as soon as possible, so you can deal more damage to the opposing team.
Keep juggling top and bottom, take Vespiqueen and Combee, pressurize your opponent team so they can't get farm, and punish anyone who tries to fight you 1-on-1.
When it reaches 02:00 mark, you have to get ready for the penultimate battle. Go inside the central area fully stacked, initiate the Zapdos aggro to bait enemies in. Then try to sneak and knock out the opposing team's attacker, almost no attacker on the game can hold their own against an Aegislash. Also keep an eye on Zapdos' health, if you're in a range for an Unite Move, use it on Zapdos when it is really low on health. Don't go too early, don't go too late -- keep your calm, you know you can get that Zapdos with your Unite Move.
3. The Top Path -- The Audacious All-Rounder
To be honest, this is just the same as bottom path, with Corpish and Aipom having a lower health than Audino. You'll also get lower experience here. Try to pressure your enemies as many times as possible, and perhaps obliterate them so you can push through their goal.
Now that you've read about the lanes, it's time for combo!
--------------
Combo
1. Honedge Farming combo
This is what you want to do when facing aggressive wild Pokémon:
Shadow Sneak > Iron Defense > Basic Attack (Boosted) > Basic Attack (Boosted)
This will ensure the wild Pokémon get mowed down in span of 7 seconds maximum.
2. Doublade Trading combo
After evolving to Doublade, you can do trades with the opponent team by doing this:
Shadow Claw > Basic Attack (Boosted) > Iron Defense > Basic Attack (Boosted) > ...
This will ensure your position is safe after a trade, however, if you believe that you can knock your target out, you should continue attacking the target.
3. Aegislash Basic combo
After evolving to Aegislash, you can finally put the pressure on the enemy team, here's how you do it:
Shadow Claw > Basic Attack (Boosted) > Iron Head > Basic Attack (Boosted) > Basic Attack (Boosted) > Shadow Claw > Basic Attack (Boosted) > Iron Head > ...
This is your bread-and-butter to deal with any sort of combat, Shadow Claw will keep your enemies knocked up, while your health is recovered thanks to Shield Forme's basic attack.
4. Aegislash Slow Smoke combo
This is your basic Combo plus your Slow Smoke:
Shadow Claw > Slow Smoke > Basic Attack (Boosted) > Iron Head > Basic Attack (Boosted) > ...
This will keep your enemies in check and probably knocked out even before you use your second Iron Head, especially when you are dealing with attackers.
5. Aegislash Wide Guard combo
If for some reason you choose to use Wide Guard, then you have to remember how to use it well:
Shadow Claw > Basic Attack (Boosted) > Wide Guard > Basic Attack (Boosted) > Basic Attack (Boosted) > Shadow Claw > Basic Attack (Boosted) > ...
You CANNOT use Wide Guard effectively without first diving towards the opposing team. Now, here's hoping your team can follow-up with you, since you cost yourself your own mobility by using Wide Guard...
Remember: Wide Guard's cooldown is incredibly long, it's entirely possible you are left in Sword Forme where you're most vulnerable to attacks while trying to continue this combo. If your opponent isn't knocked out after finishing this combo, then be prepared for the worst.
Alright, that's almost everything you need to know to utilize Aegislash effectively! Now, on to the most important thing: notes!
--------------
This section is important, you can combine everything here to fit your own playstyle.
1. Aegislash's Unite Move
It is important to note that Aegislash charges its Unite Move very efficiently. For each second passes, you gain 1% charge without the inclusion of Energy Amplifier. This means that you'll be able to get your Unite Move for your penultimate battle on Zapdos at 03:40 mark. If you use your Unite Move after that timestamp, you have to farm everything on your side of the field.
2. Aegislash's Shield Forme vs Unite Move
Being in Shield Forme gives you a durability like a 90% Defender. When you're fighting with anyone who uses their Unite Move, stave off their attacks by using your Iron Head and recover your health by using its boosted attack. Only use Shadow Claw whenever Iron Head is on 1.5 seconds cooldown, so you can cast it as soon as Shadow Claw's animation is finished.
Example of this is when Charizard uses its ultimate move on you: Immediately use Iron Head and its boosted attack, keep your Shield Forme until Iron Head's cooldown is low, then -- if Charizard's still up there, use Iron Head rather than Shadow Claw, you'll get 2 boosted counts to keep you alive. If Charizard's health is not lower than half, I'm sure you'll survive this encounter.
3. Aegislash's Boosted Attacks
For some reason, Aegislash's boosted attacks dashes are incredibly efficient against enemies with dashes (not invulnerability), especially on Shield Forme. Since almost everyone tries to jump outside Aegislash's attack range immediately when he enters, always try to keep your boosted attack on the Shield Forme for Pokémon who are able to dash with items or their own kit.
Of course, this is also one thing to consider when you're fighting an Aegislash, only escape when you know their stacks are low (or they are in Sword Forme).
4. Weakness Policy and Shield Forme
You'll almost always has 5 stack of Weakness Policy if you can keep your Shield Forme's boosted attack. For example:
Shadow Claw > Basic Attack (Boosted) -- receive damage (WP Counter: 1) > Iron Head -- receive damage (WP Counter: 2) > Basic Attack (Boosted) -- receive damage (WP Counter: 3) > Shadow Claw -- receive damage (WP Counter: 4) > ...
The longer you're in a combat, the more damage you deal, just keep your eye on your health as well, in my experience, each combat will cost you half of your full health if you're not careful. This is a dangerous situation when enemies are composed of assassins (ex: Greninja's Surf, Lucario's Power-Up Punch, Pikachu's Electro Ball).
5. Zoning or Securing Objectives
Aegislash is a master of both. With a full stack, it can help dealing dealing massive damage to objectives. But, in consideration with its bulky Shield Forme, it can also help in zoning potential objective-thieves such as Greninja, Cinderace, and Decidueye.
--------------
Aegislash is probably one of the most fun Pokémon I played in this game, not only it is self-sufficient, it can also tank damage, or deal massive damage towards the enemy team, making it the ultimate Solo Queue Pokémon.
At any rate, thank you for reading this guide, I hope this long guide can help you play Aegislash well!
Works Well With

Among all supporter Pokémon, Eldegoss' kit can help you immensely. Leaf Tornado helps your mobility on the field, and Cotton Guard gives you shield on combat! These two moves will ensure that your enemies can't escape and forces them to fight you!

Blissey's Safeguard is a boon for Aegislash who is incredibly weak to crowd control. Blissey's Unite Move also synergizes well with Aegislash thanks to the latter's diving capabilities.

Hoopa's Trick gives Aegislash more bulk and, because of Aegislash's incredible capability on diving at enemies, makes it easier for Hoopa to land those Shadow Ball to land its sweet, sweet incapacitation.
Pokemon Unite .GG thanks user Nipi for sharing this guide on how to play Aegislash. Be sure to support your favorite creators by upvoting their builds, videos, and anything else they share you find useful. You can also check this user's page for more build guides.
There are indeed many ways to play Aegislash in Pokemon Unite, and you can find more builds here, as well as detailed information about Aegislash's moves and the items you can assign to it.
Perhaps you have a better build in mind? Try creating your own!
For more information on build guides, check out our detailed FAQ page to answer any more questions you may have.