
CCTank Bodylax Snorlax - Remmock


Don’t let them move.
Build Path
TackleFirst Pick
Heavy Slam
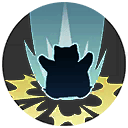
Power NapUNITE
Spellproof. AOE damage. Displacement. Heal. Second activation: AOE damage.
Focus Band
When HP is low, gradually recovers HP.
Assault Vest
When out of combat, gain a percentage of your maximum health as a shield that blocks special attacks.
Rocky Helmet
After taking a certain amount of damage, deals Percent Damage to nearby opponents.
Eject Button
Instantly teleport yourself somewhere nearby.
Stat Boosts
Special Move Shield (Out of Combat)
Reflect Damage (Max HP%)
Guide
As well-built as Snorlax is, the most effective use is to control enemy damage. This build is designed to protect your team with strategic placement by being very aggressive and relying on solid backup from your lane partner or teammates.
Early Snorlax will do well to rush Tackle and flop once on feed to move quickly, then let your partner mop up with ranged or a follow-up. Grab as much feed as you can as quickly as possible including enemy feed. Ideal early game technique is to hide and hold your Tackle while they kill feed, then rush in and use Tackle to snipe the feed before killing the stunned player.
Run back to your Goal and Rest when you’re low, saving your berries for your allies. Use Tackle and the right joycon to snipe berries before your enemies can get them if you’re fighting on top of your Goal.
You will eat berries more often later in the game if they’re available as you get a huge bonus from them.
When Solo: You will have a lot of control over the flow of the fight. Carefully juggle Heavy Slam and Yawn to whittle your opponents down and handle multiple opponents. Stay on the move to help group them up to keep your Crowd Control options viable, including circling your opponents.
With Team: Behave as if you’re engaging Solo, but remember to keep yourself as the primary target. Move to intercept any opponent attempting to engage your backup as keeping them alive is your top priority. This build is not about personal glory, but about ensuring Team wins and successful Team Fights. Your shield against Special Attacks provides a barrier from being blitzed down with moves and is improved by the ample HP you get from your item set. The Rocky Helmet also punishes enemies who can sustain high damage after your shield collapses, getting them out of the picture faster. After outlasting their burst, Focus Band’s generous 42% over 9 seconds will keep you going while they’re waiting on cooldowns. Team success includes providing cover for fleeing teammates as preventing 2 or more allies from dying is worth throwing yourself in harm’s way.
Works Well With

Blissey can lurk behind and provide the healing necessary to allow Snorlax to stand between enemy players and priority targets like Zapdos or Rotom.

A Support-focused Eldegoss can keep these two in the fight against even the most-burst-focused opponents and can just keep going. Do not be shy about engaging your enemies as long as you hang close.

The backup crowd control and high damage output mean your targets aren’t going anywhere while you rack up assists.
Pokemon Unite .GG thanks user Remmock for sharing this guide on how to play Snorlax. Be sure to support your favorite creators by upvoting their builds, videos, and anything else they share you find useful. You can also check this user's page for more build guides.
There are indeed many ways to play Snorlax in Pokemon Unite, and you can find more builds here, as well as detailed information about Snorlax's moves and the items you can assign to it.
Perhaps you have a better build in mind? Try creating your own!
For more information on build guides, check out our detailed FAQ page to answer any more questions you may have.